Guide: Mount Your Outdoor Dummy Camera Dome Bullet Perfectly
The Outdoor Dummy Camera Dome Bullet is a powerful security tool that blends seamlessly into outdoor…….
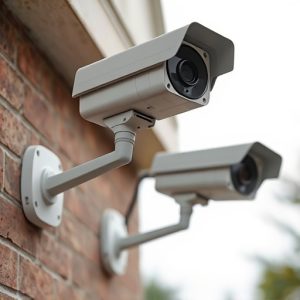
The Outdoor Dummy Camera Dome Bullet is a powerful security tool that blends seamlessly into outdoor spaces, offering high-definition video, infrared lighting, and 360-degree surveillance. Pre-installation checks are vital, including ensuring clear visibility and securing a sturdy mounting surface. Selecting the right location with good light for optimal view is key. Proper wiring and power connections are crucial for smooth operation. Fine-tuning the camera's placement after installation ensures minimal obstruction and optimal coverage. Regular testing maintains the system's efficiency and reliability in monitoring properties.
“Elevate your home security with an exterior fake CCTV mounting guide for the Outdoor Dummy Camera Dome Bullet. This comprehensive step-by-step tutorial covers everything from understanding your device’s unique features, performing pre-installation checks, and making precise adjustments to ensure optimal performance. Learn how to securely mount the camera body, connect wires seamlessly, and power up your surveillance system effectively. By following these instructions, transform your outdoor space into a fortified zone with a realistic, yet dummy, CCTV setup.”
- Understanding Your Outdoor Dummy Camera Dome Bullet
- Pre-Installation Checks and Preparation
- Mounting the Camera Body
- Connecting Wires and Power Sources
- Final Adjustments and Testing Procedures
Understanding Your Outdoor Dummy Camera Dome Bullet
When it comes to exterior security, an Outdoor Dummy Camera Dome Bullet can serve as a highly effective deterrent and essential surveillance tool. This type of camera resembles a traditional bullet-shaped dome light, designed to blend seamlessly into your outdoor environment while offering a realistic simulation of active surveillance. Understanding its unique features is crucial for successful installation and maximization of its potential.
Each Outdoor Dummy Camera Dome Bullet comes equipped with advanced technology, including high-definition video capabilities and infrared lighting for night vision. The dome design provides 360-degree visibility, ensuring comprehensive coverage of your property. By strategically placing this camera, you can monitor entry points, driveways, and outdoor spaces, creating the illusion of constant observation. This simple yet powerful tool is a game-changer in home security, offering peace of mind and an added layer of protection.
Pre-Installation Checks and Preparation
Before mounting your outdoor dummy camera, perform a series of pre-installation checks and preparations to ensure a seamless setup. Verify that the location you’ve chosen offers adequate visibility for the camera’s lens—a clear line of sight is crucial for effective surveillance. Check for any potential obstacles or blind spots that might impede the camera’s field of view, such as large trees, buildings, or other structures. Ensure the surface where you plan to mount the camera is sturdy and suitable, whether it’s a wall, fence, or pole. Inspect the mounting hardware provided with your dummy camera dome bullet to confirm its compatibility with your chosen location.
Preparation includes gathering all necessary tools, which typically include screwdrivers, drill bits, and any other accessories included in the packaging. Clean the surface thoroughly to remove dirt, debris, or paint that could affect adhesion or cause damage. Measure twice to ensure accurate placement, marking the spots where you’ll secure the camera for stability. Protect yourself and your surroundings by wearing safety gear, such as gloves and eye protection, especially if using power tools.
Mounting the Camera Body
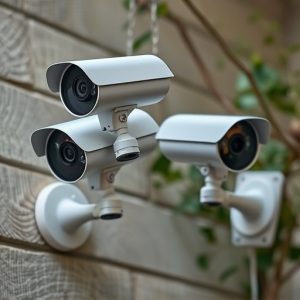
When mounting an outdoor dummy camera, such as a dome or bullet-style camera, the first step is to choose the ideal location. This should be a spot that offers clear visibility and adequate light for optimal surveillance. Once the location is identified, securely attach the camera body to its mount using the provided hardware. Ensure all screws are tight to prevent any movement that could disrupt the camera’s performance.
The camera body should be positioned at eye level or slightly elevated to capture a comprehensive view. Consider factors like tree branches or nearby structures that might obstruct the field of view and adjust accordingly. Proper mounting ensures the camera captures high-quality footage consistently, making it an essential step in setting up an effective security system.
Connecting Wires and Power Sources
When setting up an outdoor dummy camera, such as a dome or bullet-style fake CCTV, one of the most crucial steps is connecting the wires and power sources correctly. Begin by identifying the power requirements for your specific model. Most outdoor dummy cameras operate on either battery or a standard electrical outlet. If using batteries, ensure you install high-quality, long-lasting ones to avoid frequent replacements. For hardwired cameras, locate the nearest suitable power outlet and run the cable securely through walls or floors if necessary.
Next, pay close attention to the wiring. These cameras typically have separate wires for video transmission, power, and sometimes additional features like motion detection. Route these wires neatly and securely, ensuring they are protected from damage and weather conditions. Connect the wires to the corresponding ports on the camera according to the manufacturer’s instructions. Proper wiring is essential to guarantee smooth operation and avoid any potential safety hazards associated with exposed or damaged cables.
Final Adjustments and Testing Procedures
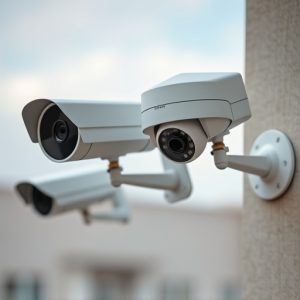
After securing the exterior fake CCTV camera, perform final adjustments to ensure optimal positioning and field of view. Adjust the camera’s angle and direction using the adjustable mounts provided to capture the desired area clearly. Make sure the dome is aligned correctly, giving a seamless appearance with minimal gaps or shadows.
Once positioned, test the functionality of the outdoor dummy camera thoroughly. Check all connections, power sources, and cables for secure attachments. Activate the camera’s power and verify that it is transmitting clear and consistent footage. Adjust settings as needed to optimize picture quality and ensure the camera meets your security requirements. Regular testing will also help identify any potential issues early on, ensuring your system remains reliable and effective in surveillance.
The successful installation of an outdoor dummy camera dome bullet involves careful preparation and adherence to each step. By understanding your device, performing pre-installation checks, and meticulously mounting the camera body, you lay the foundation for effective surveillance. Securely connecting wires and power sources ensures optimal performance, while final adjustments allow for precise viewing angles. With these steps completed, your outdoor dummy camera dome bullet is ready to provide enhanced security, offering peace of mind in today’s digital era.